This summer, Skokie Public Library is offering daily after-lunch drop-in programs for youth entering grades 3-5. Every Friday is billed as “Science Friday,” and these days are reserved for simple and engaging science experiments and inquiry. We have been attracting a solid group of kids–larger audiences than we’ve traditionally seen for drop-in science activities–so we purposefully think about offering activities that will engage and interest a wide range of kids. I recently went the STEAM route with blooming paper flowers, an activity requiring few supplies and that can be hosted inside or out.
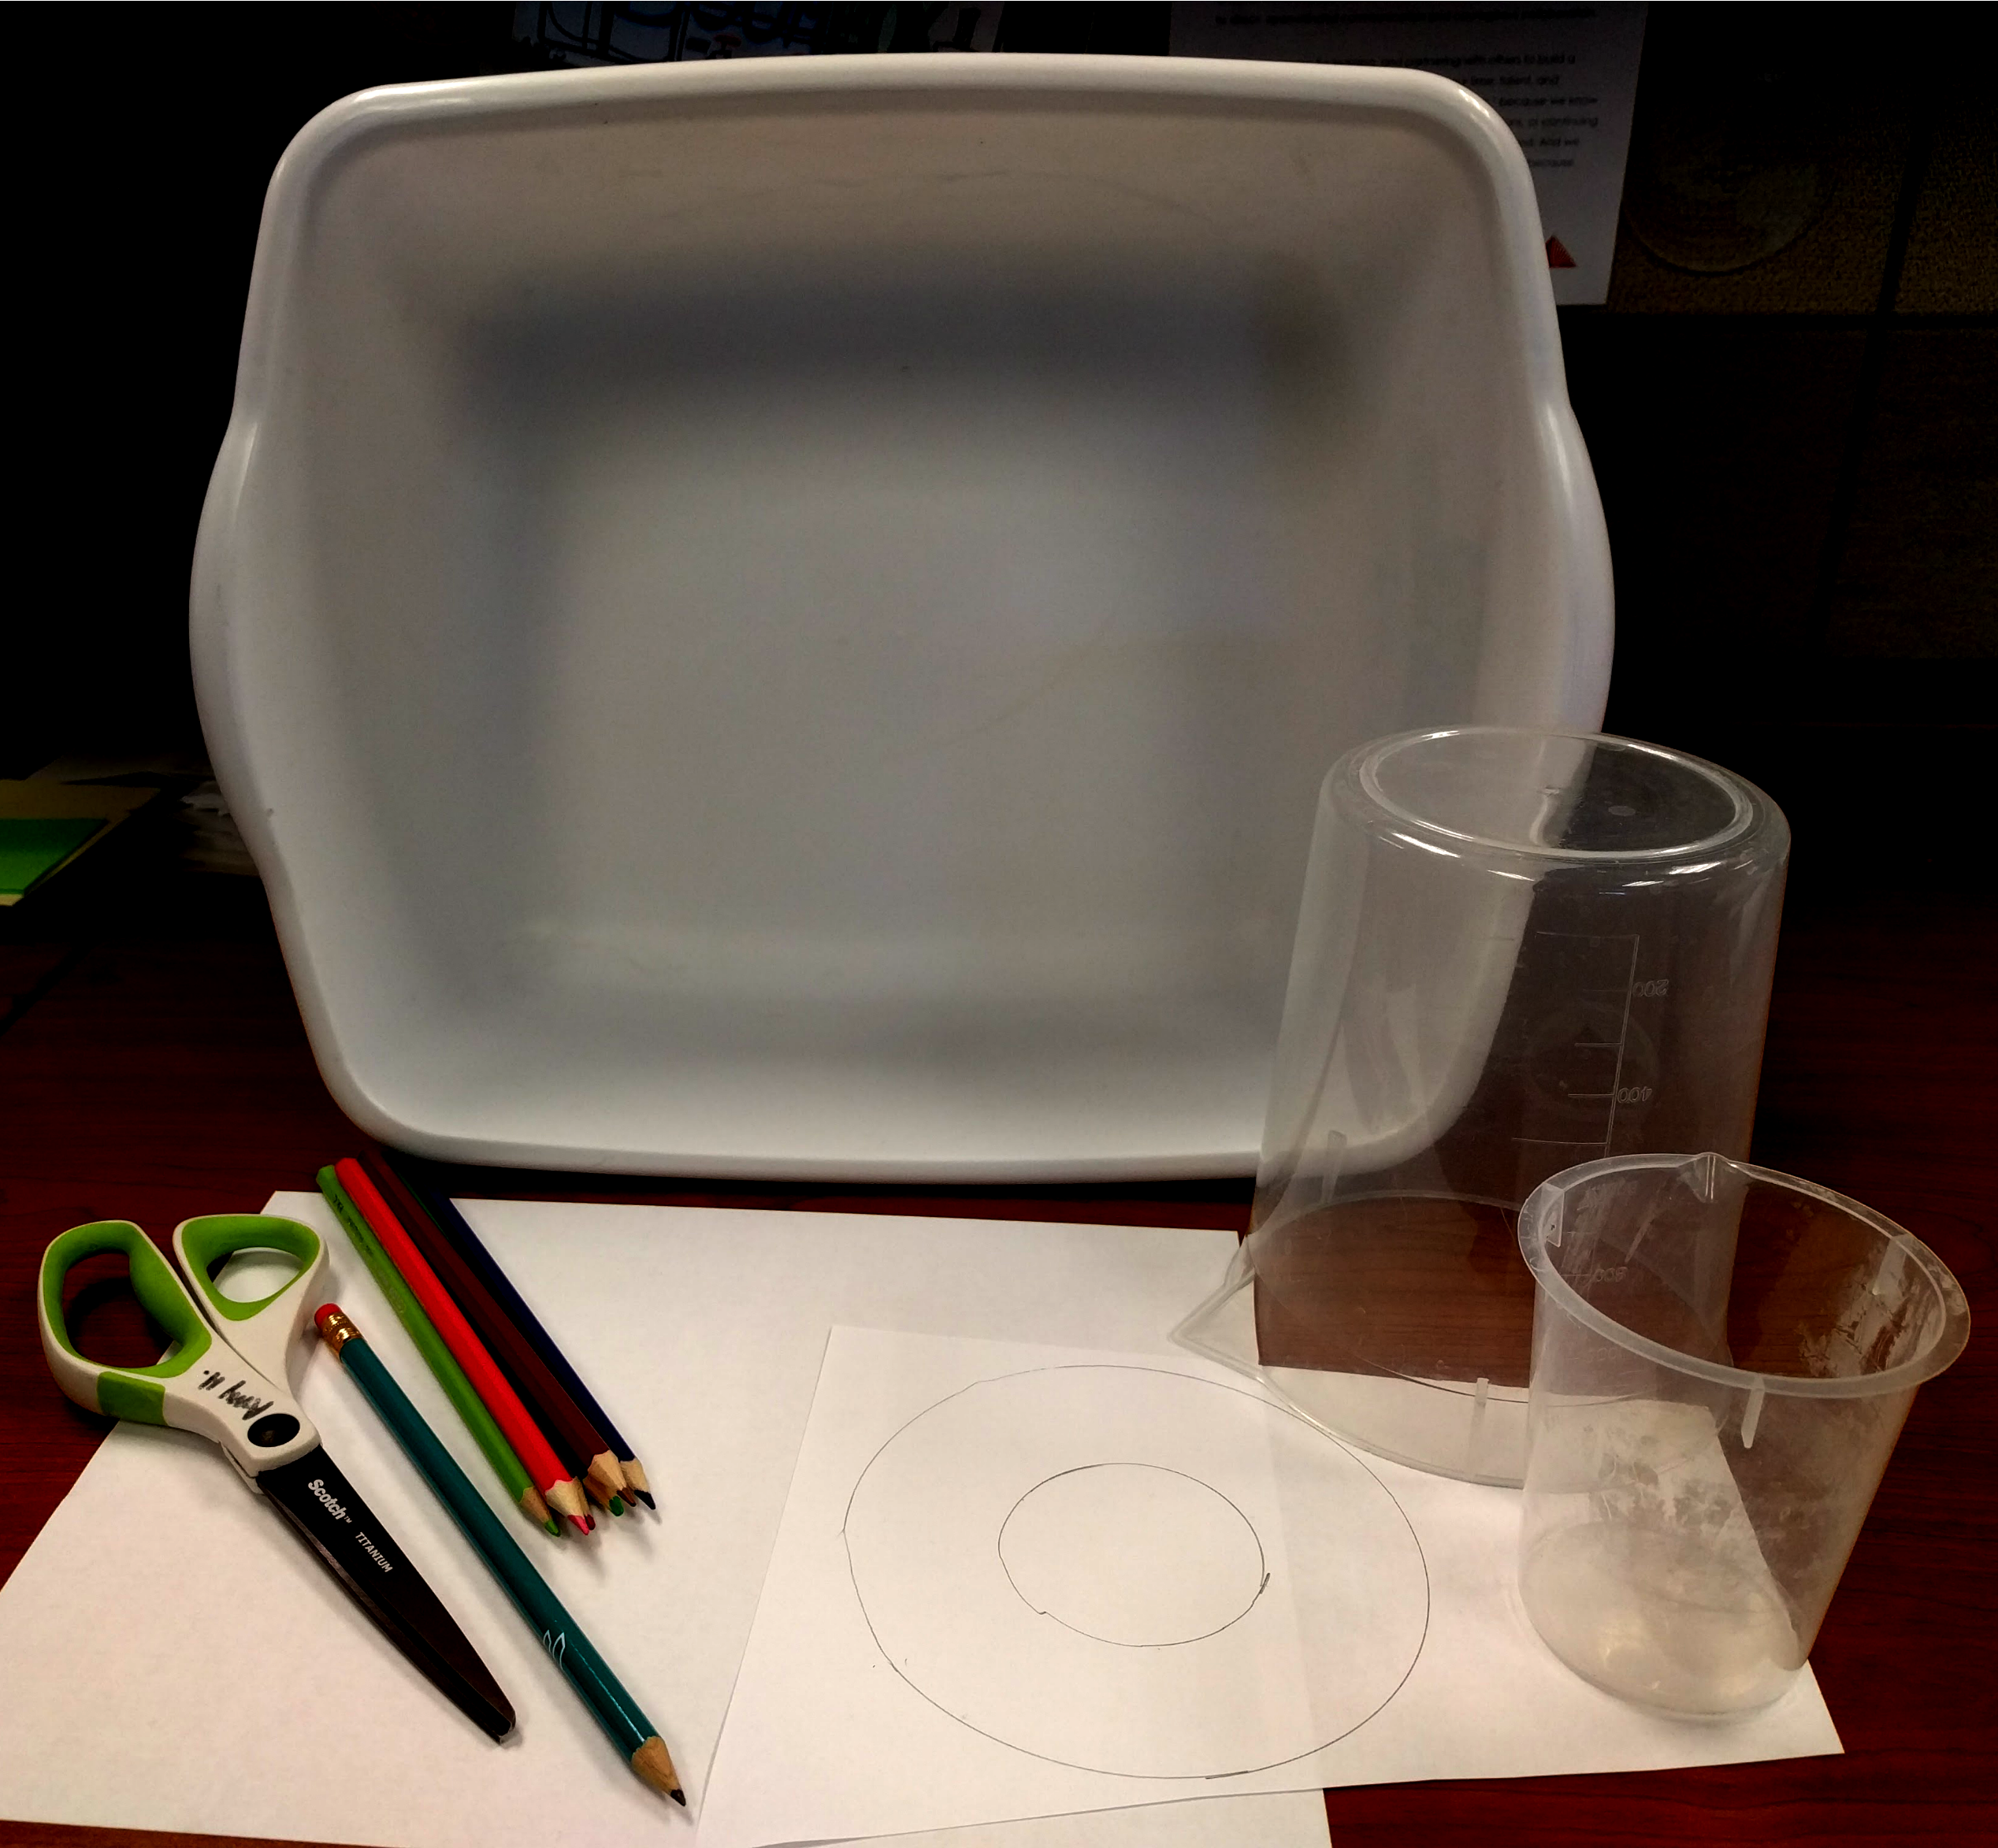
For the supplies, you’ll need regular printer paper, pencils, circular objects for tracing (or compasses), coloring supplies like markers or crayons, and either bins, deep cookie sheets, or bowls for water.
I started off the experiment by talking about the supplies on hand. I asked kids what they knew about paper and what it was made from, and that led the discussion to talk about plants and how they absorb water. From here, I provided a brief demo of making the paper flower and then we all watched it bloom.
I asked the kids why they thought the paper flower bloomed–what caused the petals to open. Thinking back to our paper discussion, we talked about what happens when paper gets wet and how the small drop of water spreads into a larger circular shape. Kids concluded that the paper absorbs the water and as more and more water is absorbed, the petals get heavy and fall. I then explained that the water was being absorbed along the paper folds, and as this area expanded, the petals were forced to open.
Completing the demo, I asked the kids if they thought the same paper flower would bloom faster, slower, or at the same rate if we tried it again. After drying the flower with an iron, I refolded the petals and we all observed. The paper flower bloomed more quickly this time and kids hypothesized why that happened before getting started on the experiment themselves.
To make the flowers, have the kids draw two concentric circles, with the outer circle having a radius roughly the length of the inner or smaller circle’s diameter. If you’re using a compass, kids can measure accurately. We didn’t haven’t enough compasses on hand for everyone, so we also used plastic beakers that worked pretty well for tracing.
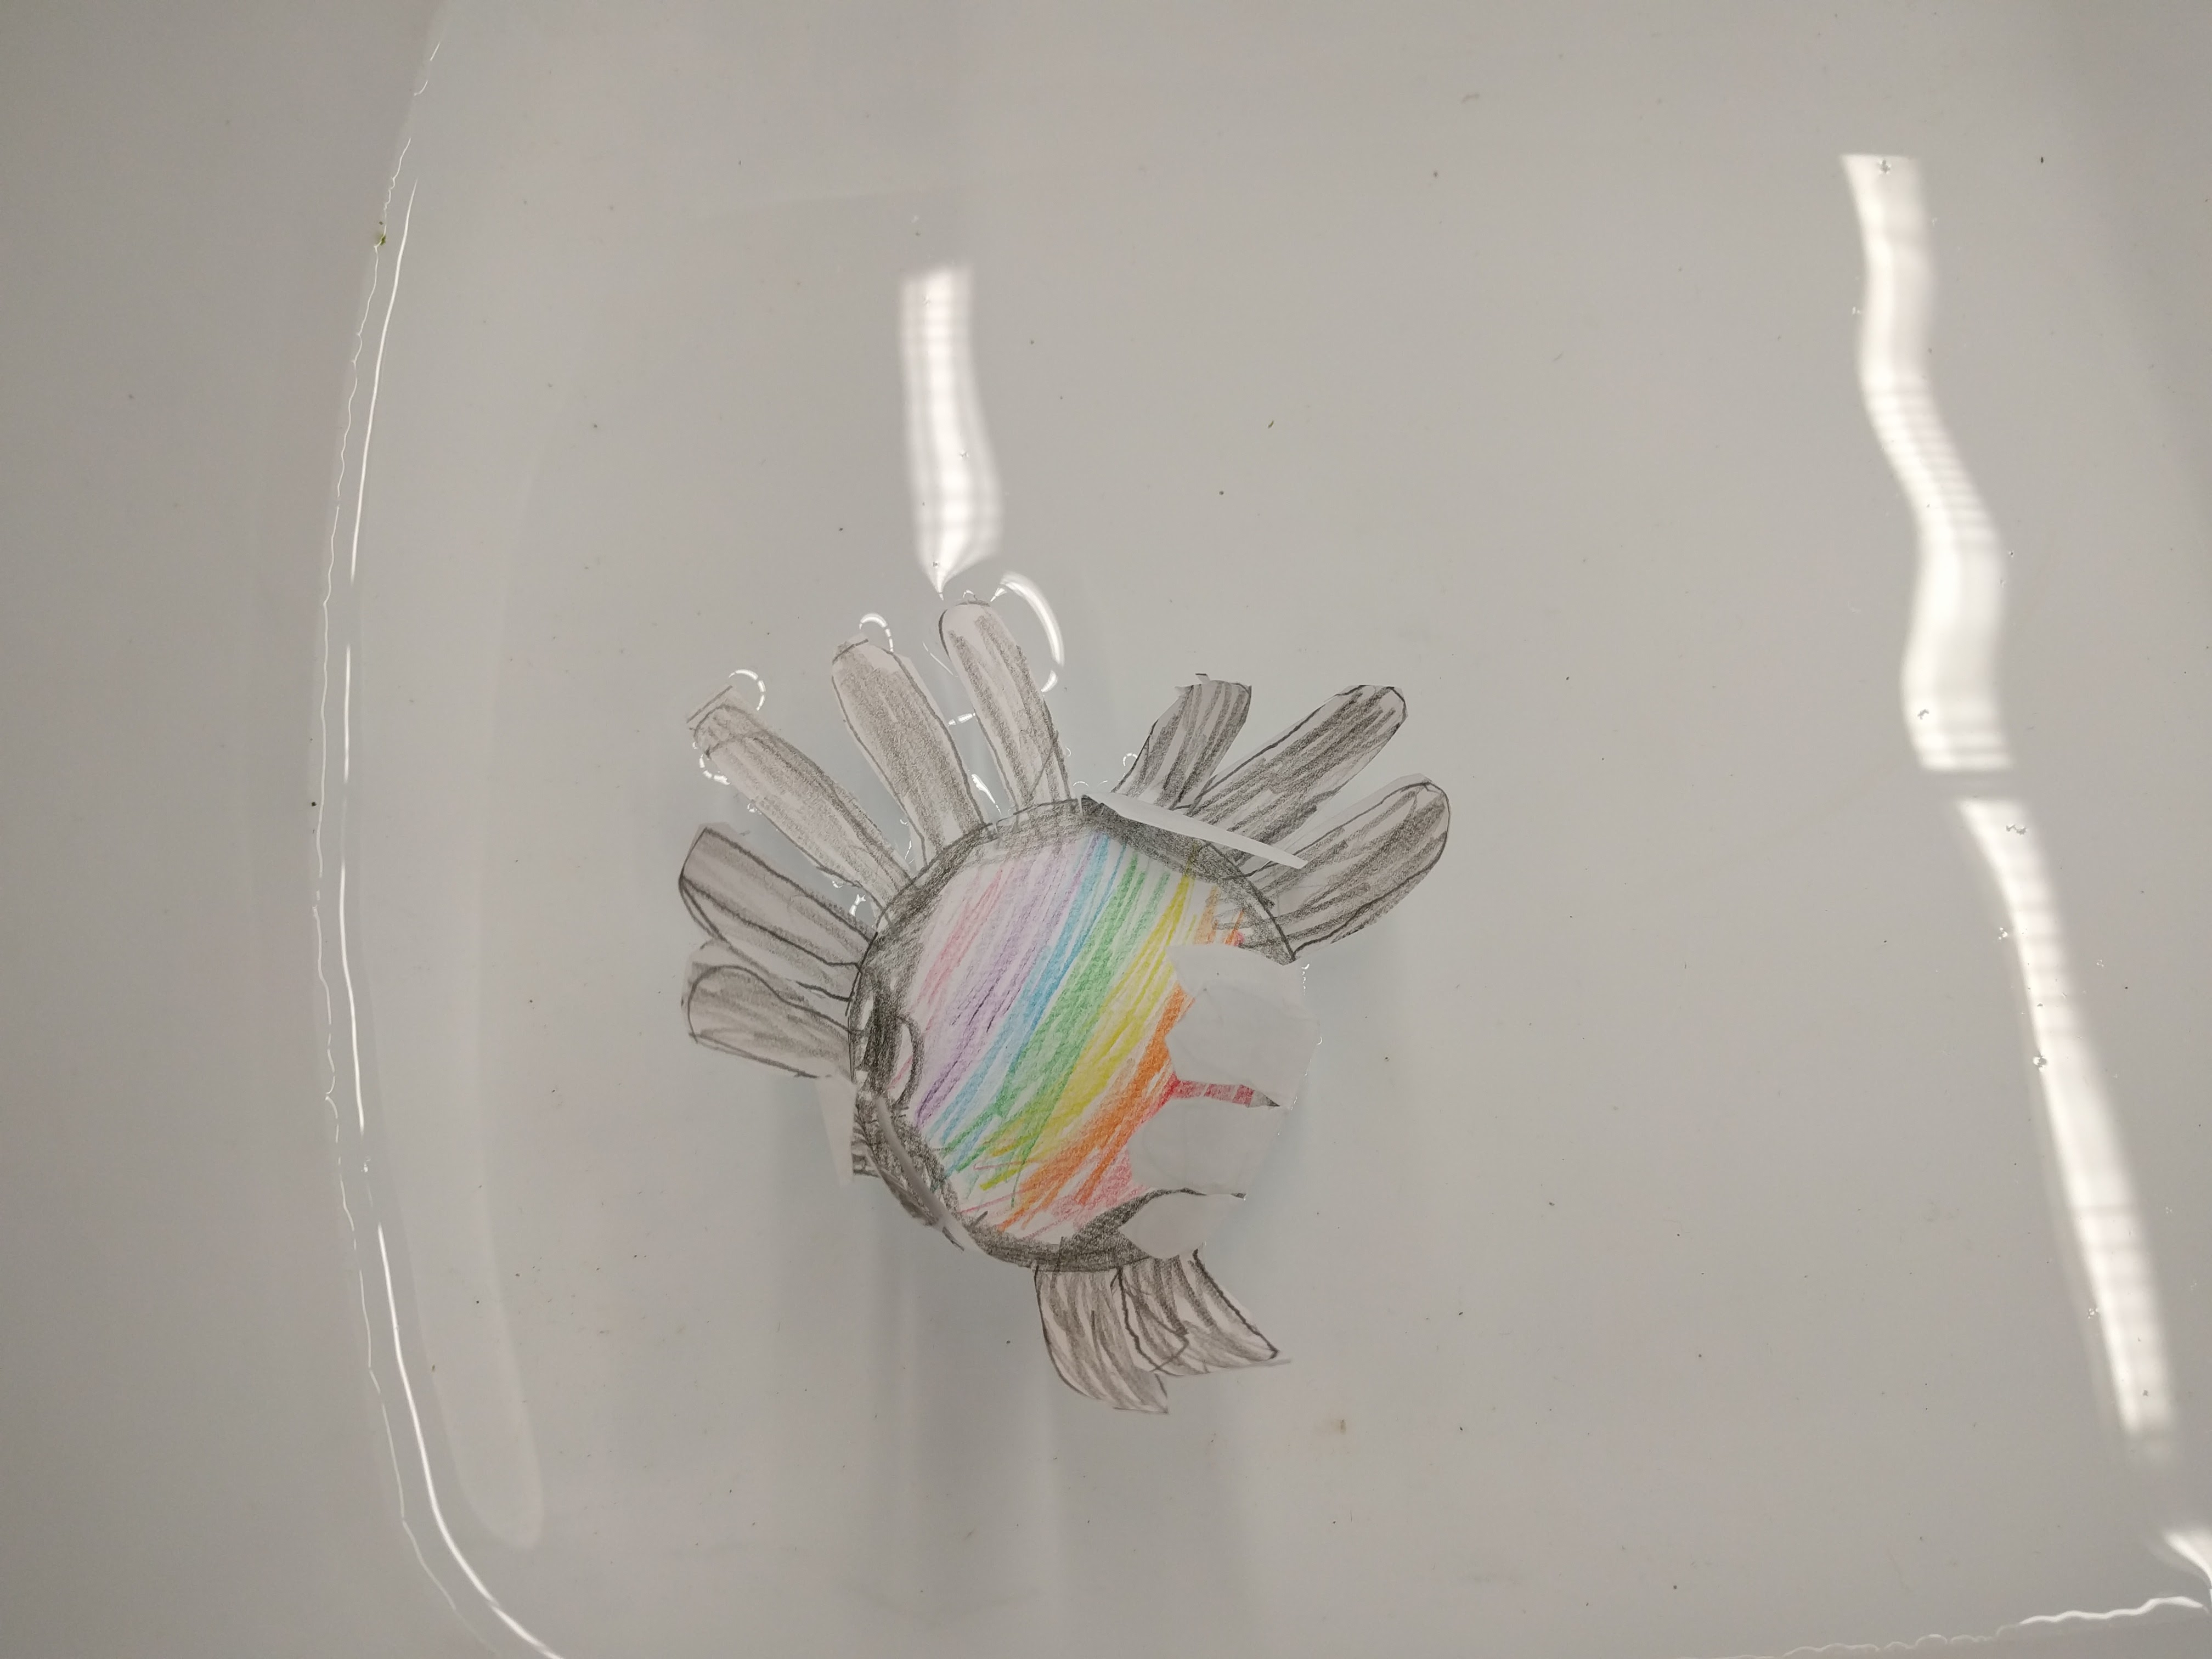 After drawing the circles, draw in petals that stem from the inner circle and reach up to the outer circle by tracing your fingers. Petals should be drawn close together. Once the flower is drawn, kids can color it with colored pencils, crayons, or even markers before cutting it out. The petals should be folded tightly, one over the other, progressing in one direction. Place the folded flower petal-side up in a bin or bowl of water and observe what happens.
This activity is easy to replicate and welcomes experimentation with different variables like type of paper, coloring utensils, flower size, petal size, and even water temperature. The kids enjoyed making predictions about what would happen with a certain variable in play. Many opted to take their damp paper flowers home to show family members and friends; each flower can be reused a few times.
This particular Science Friday was a resounding success–kids really got into the process of creating and decorating their flowers, then testing the creations to see how they would bloom. Art and inquiry all rolled into one!
Leave A Comment