There’s been a bit of a chill in the air the last week or so, a frequent thumping on the roof of pecans falling out of the tree in the yard, and a sense of frantic feasting radiating from the hummingbirds who frequent the feeders on my porch. Autumn is here.
One of my favorite things to do as the seasons slip away from summer and toward winter is to walk through wooded areas and collect brightly colored leaves. This is something my mother did with me as a very young child on my great grandparents’ farm. I still have the home-made album in which we carefully attached the bright yellow, red, and purple leaves we collected from the ground under trees where the family mule had sheltered from the summer sun after pulling a plow all day, or from the rain when storms passed over.
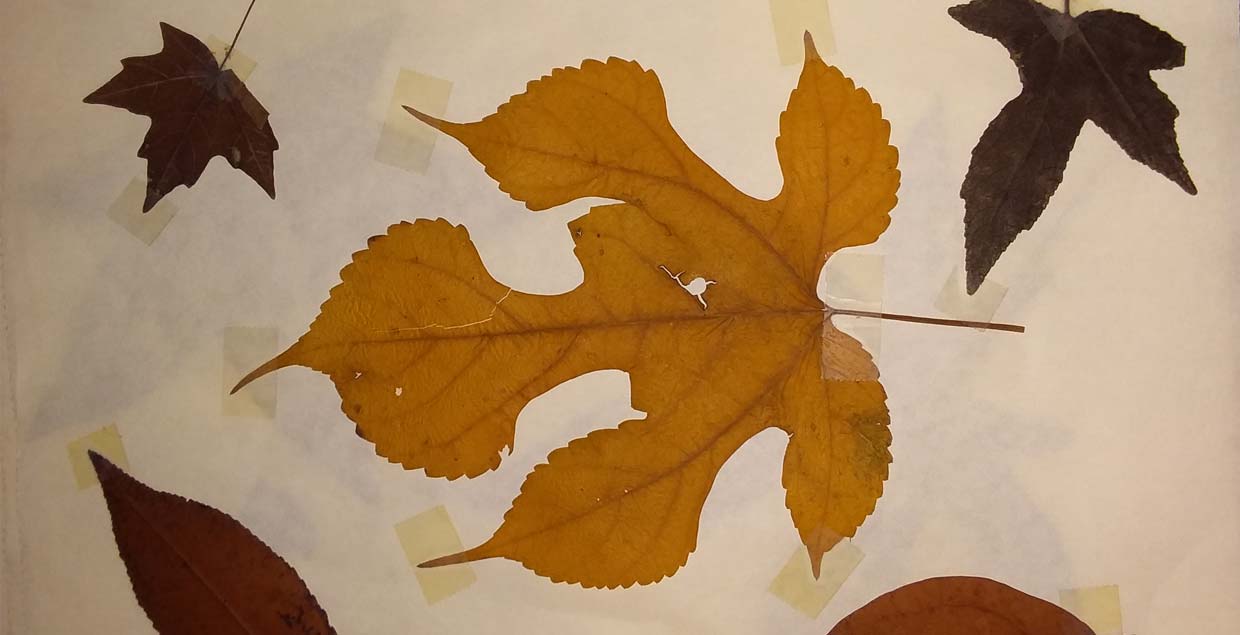
In fact, I took a quick break, and retrieved the album. It is amazing how well these leaves, some over 40 years old, have been preserved!
This year, with so many families sheltering at home, and school being more often virtual than in person, it might be a great stress-relieving, fun, and educational activity to get out of the house (or library) and take a walk in a park or other wooded area and collect some leaves. Once you get back home, there are quite a few things you can do to extend the tree-themed day.
For a leaf album, you could use a regular 3 ring binder and stiff paper or cardstock for pages. But if you want to extend the activity over a longer period of time, add a bit more creativity, and add some life skills, you could make your own leaf album. To replicate my leaf album, you will need a phone book, a bundle of newsprint, or a heavy old book, binder rings, corrugated cardboard, fabric pieces large enough to sew around the cardboard, needle and thread, paper or cardstock, tape, scissors, and something with which to write. My pages are not in any way archival, but you could get some photo album pages with adhesive covers that would work even better.
How to press plants at home:
The fresh leaves need to be pressed between the pages of the book or newsprint, and weighted down with something heavy placed on top of that. Once the leaves are tucked away safe and sound to dry out and get flat, you can cut the corrugated cardboard into covers for your album. Cut the fabric into rectangles that you can sew into pouches to cover the cardboard and become your album covers. You may want to punch holes in the cardboard for the binder rings before sealing it in the fabric. I like to hand sew the covers to teach sewing skills and practice hand/eye coordination, but you can glue the fabric to the cardboard, paint the cardboard, glue decorative paper to the covers, or any of a multitude of other activities to personalize and decorate the albums. Once the covers are complete, add the binder rings and pages. Once your leaves have dried completely, you can add them to your album.
Using the colors and shapes of the leaves you collect, you can identify the parent trees. A little research will allow you to learn which trees are native to your area and which are considered invasive. You could also use research and observation to learn what animals live in and depend on which trees.
Why don’t you add illustrations to your album? You could draw pictures of the trees your leaves came from? You could add the animals that live in and/or depend on your trees. Perhaps you could even add a map showing where in the region/state/country/world those trees live.
You can also arrange your leaves on the pages of your album to create patterns and pictures.
By the way, a collection of dried plants or plant parts is called an herbarium.
Here’s a video tour of the New York Botanical Gardens’ Steere Herbarium:
Here are some videos showing how to press and dry all kinds of plants:
Here’s a tour of a finished leaf album. It’s great!
There are quite a number of trees that change color as the weather gets cooler, but the they don’t actually undergo this transformation just because it’s cooler outside. There are a number factors that contribute to the brilliant tree colors of autumn. Trees actually begin to change color as a response to the shortening daylight hours. As days get shorter, trees produce less of the chlorophyll they use to transform sunlight into the sugar that feeds them. As the green colored chlorophyll disappears, the leaves’ true colors begin to appear. Carotenoids are the chemicals that produce yellows, golds, and oranges. Carotenoids are always in the leaves, which is why those colors are fairly consistent year after year. Various shades of brown are caused by tannins. Red, burgundy, and purple in the leaves are caused by chemicals called anthocyanins, which trees produce in order to keep sap from being trapped in the leaves and lost when the leaves fall to the ground. Weather conditions have a lot to do with the amount of anthocyanins that trees produce. The best and brightest reds and purples can be seen in years with warm, wet springs, summers that aren’t too hot and dry, and autumns with warm days and cool nights.
Take a breath. Take a break. Go collect some pretty leaves, and start your own herbarium!
Resources:
Tree Quizzler Game (Word Jumble)
Tree Trivia (Some questions are specific to Wisconsin.)
Why Do Leaves Change Color? (Article)
Dichotomous Tree Key (Online tree identification)
What Tree is That (Online tree identification)
Carly’s Kids Corner (All kinds of online and printable tree activities)
Junior Forest Ranger and Junior Snow Ranger Programs (Kids can earn their own membership cards!)
Digital Herbarium at Butler University


Leave A Comment